Skip to content
Save now: 50% furniture & kitchen discount* | Order hotline: 1-(090)-123-ELLA

News

Transforming Your Home with an Epoxy River Table

by office@ theimmart.com 19 Sep 2024 0 comments

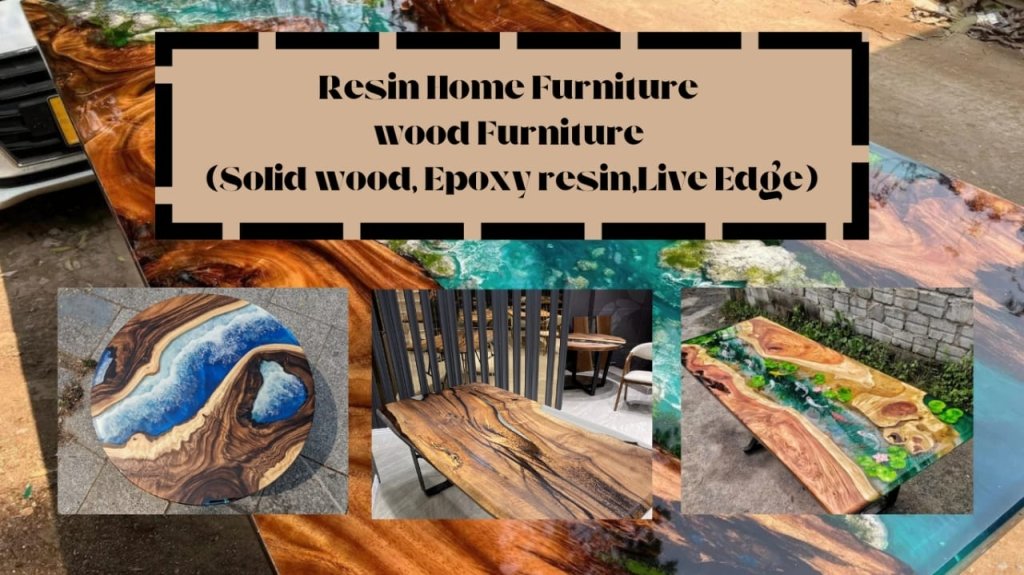
If you’re looking to elevate the beauty of your home, consider the stunning addition of an epoxy river table. This unique piece of furniture not only serves as a functional surface but also as a captivating work of art. Here’s how an epoxy river table can enhance your space and some tips on how to create one.

What is an Epoxy River Table?

An epoxy river table is made by pouring resin into the grooves or gaps of a wooden slab, mimicking the appearance of a flowing river. This technique allows for endless design possibilities, creating a beautiful contrast between the natural wood and the vibrant epoxy.

Why Choose an Epoxy River Table?

  1. Unique aesthetic: Each table is one-of-a-kind. The combination of wood grains and colored epoxy makes for a stunning centerpiece.

  2. Versatility: Whether you’re decorating a dining room, living room, or office, epoxy river tables fit seamlessly into various decor styles, from rustic to modern.

  3. Durability: Epoxy is highly resistant to scratches, stains, and water, making your table not only beautiful but also practical.

How to Create Your Own Epoxy River Table

Step 1: Gather Materials

  • Wood slab (choose a type that suits your style)
  • Epoxy resin (clear or colored)
  • Wood finish (like oil or varnish)
  • Tools: saw, sander, clamps, measuring tape, and drill

Step 2: Design Your Table

  • Decide on the size and shape of your table.
  • Sketch your design, considering how the epoxy will flow through the wood.

Step 3: Prepare the Wood

  • Flatten and sand the wood slab to create a smooth surface.
  • Make sure to clean the wood to remove any dust or debris.

Step 4: Create the River Effect

  • Use a router to carve out a channel in the wood where you want the epoxy to flow.
  • Clamp the wood securely to prevent movement when pouring the resin.

Step 5: Mix and Pour Epoxy

  • Follow the instructions on your epoxy resin kit for mixing.
  • Pour the resin into the carved channel, allowing it to fill the space completely


                        Mix Epoxy

                      Pour Epoxy      

Step 6: Finishing Touches

  • Once the epoxy has cured, sand the surface again for a smooth finish.
  • Apply your chosen wood finish to enhance the natural beauty of the wood.


Step 7: Assemble the Table

  • Attach the legs or base securely.
  • Ensure stability before placing it in your desired location.

How an Epoxy River Table Beautifies Your Home

  1. Focal Point: Its striking design draws attention, making it a conversation starter.

  2. Personalization: Choose colors and wood types that reflect your personality and complement your home’s decor.

  3. Functional Art: Use it as a dining table, coffee table, or desk, adding both beauty and functionality to your space.

Conclusion

An epoxy river table is more than just furniture; it’s an artistic expression that enhances the beauty of your home. With the right materials and a bit of creativity, you can create a stunning piece that reflects your style. Whether you buy one or make your own, this unique table will undoubtedly become a cherished part of your home decor. Happy crafting!


Sample Image Gallery

SPRING SUMMER LOOKBOOK

Sample Block Quote

Praesent vestibulum congue tellus at fringilla. Curabitur vitae semper sem, eu convallis est. Cras felis nunc commodo eu convallis vitae interdum non nisl. Maecenas ac est sit amet augue pharetra convallis.

Sample Paragraph Text

Praesent vestibulum congue tellus at fringilla. Curabitur vitae semper sem, eu convallis est. Cras felis nunc commodo eu convallis vitae interdum non nisl. Maecenas ac est sit amet augue pharetra convallis nec danos dui. Cras suscipit quam et turpis eleifend vitae malesuada magna congue. Damus id ullamcorper neque. Sed vitae mi a mi pretium aliquet ac sed elitos. Pellentesque nulla eros accumsan quis justo at tincidunt lobortis deli denimes, suspendisse vestibulum lectus in lectus volutpate.
Prev post
Next post

Leave a comment

All blog comments are checked prior to publishing

Shop the look

Choose options

Sign Up for exclusive updates, new arrivals & insider only discounts

Recently viewed

Social

Edit option
Have Questions?
Back In Stock Notification
Terms & conditions
What is Lorem Ipsum? Lorem Ipsum is simply dummy text of the printing and typesetting industry. Lorem Ipsum has been the industry's standard dummy text ever since the 1500s, when an unknown printer took a galley of type and scrambled it to make a type specimen book. It has survived not only five centuries, but also the leap into electronic typesetting, remaining essentially unchanged. It was popularised in the 1960s with the release of Letraset sheets containing Lorem Ipsum passages, and more recently with desktop publishing software like Aldus PageMaker including versions of Lorem Ipsum. Why do we use it? It is a long established fact that a reader will be distracted by the readable content of a page when looking at its layout. The point of using Lorem Ipsum is that it has a more-or-less normal distribution of letters, as opposed to using 'Content here, content here', making it look like readable English. Many desktop publishing packages and web page editors now use Lorem Ipsum as their default model text, and a search for 'lorem ipsum' will uncover many web sites still in their infancy. Various versions have evolved over the years, sometimes by accident, sometimes on purpose (injected humour and the like).

Choose options

this is just a warning
Login
Shopping cart
0 items